Running jupyter notebook
This document will guide you to create a conda environment and run jupyter notebooks in the adroit cluster or your own computer. This should be sufficient to do most of the coding projects of APC 523.
adroit is Princeton HPC cluster that can be used to run jupyter notebook remotely through the new OnDemand web-based platform MyAdroit.
This guide will mainly use /bin/bash/ shell and python3.
Setting up adroit account
- If you do not already have
adroitaccount, fill in the registration form.
You will receive a helpdesk ticket after filling in the form, please wait until the ticket is resolved and an account is created. - If you are not in Princeton network, connect through VPN.
- Make sure you can login to
adroitthrough eithersshor MyAdroit.
In MyAdroit, click on Clusters > Adroit Cluster Shell Access, or click here.
- Load
condain the cluster usingmodulecommand.module load anaconda3/2021.11Note that you need to specify the
anacondaversion which you can check throughmodule availcommand. - Test that
conda listgive the list of currently installed packages. You can check the current environment and thecondaversion usingconda infocommand.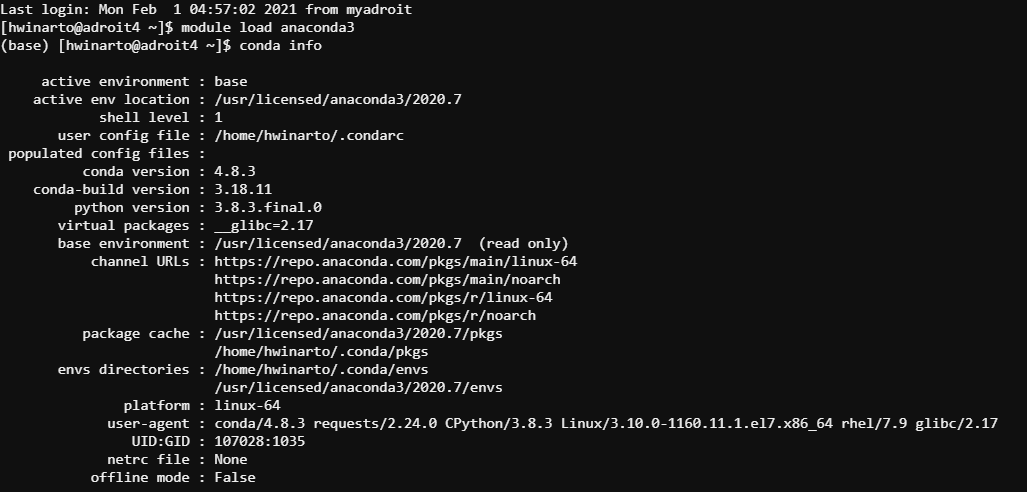
Setting up conda environment
For this course conda environment provided in APC523.yml should contain relevant packages to do most of the works.
- Copy the environment file from this site to the location that can be accessed by your terminal.
You can use the web interface in MyAdroit by clicking Files > Home Directory or /scratch/network/[netid].
- Create the new
condaenvironment by invoking the create environment command.conda env create -f [path_to_file]/APC523.ymlWait until the installation is finishes as it might take a while.
- Test that the environment can be activated through the shell.
conda activate APC523 - If you need to remove the environment, you can do so by invoking this command.
conda remove --name APC523 --allVerify that the environment is removed using
conda info --envs.
Running jupyter notebook in cluster
- Login to MyAdroit.
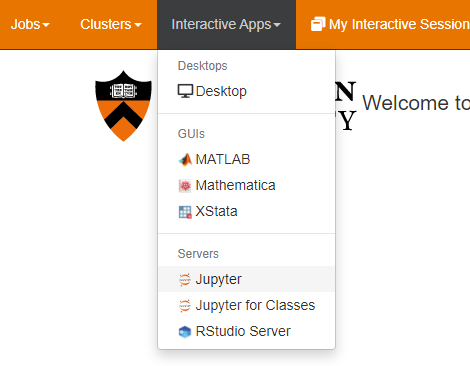
- Click on Interactive Apps > Jupyter or click here.
- Fill in the number of hours for reservation (typically <=4 hours, longer duration might take longer in queue) and number of cores (typically 1 as it is hard to parallelize code in
jupyternotebook). If you are usingjupyterlabcheck the option Use JupyterLab instead of Jupyter Notebook? then click Launch.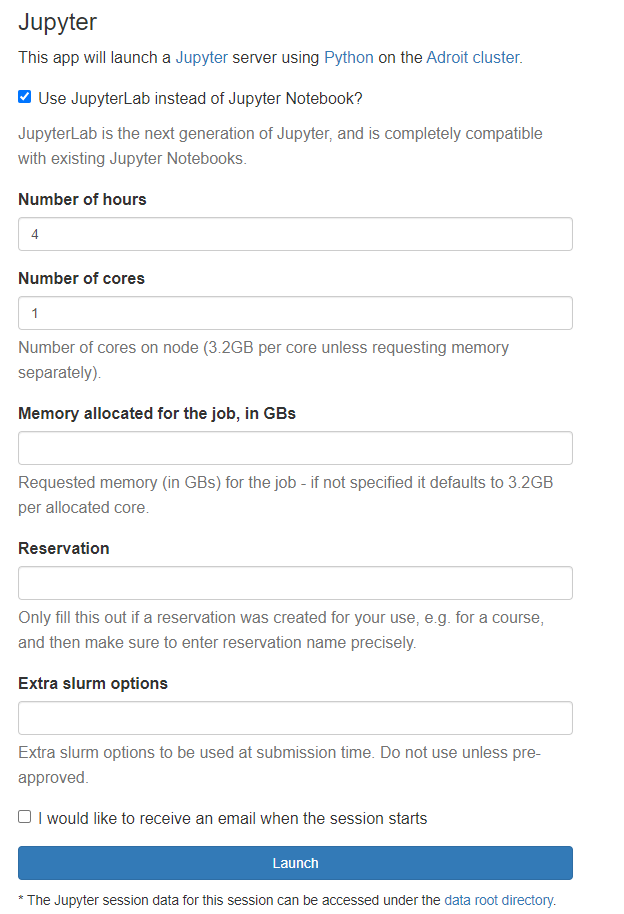
- When the job queue is finished and start running click on the Connect to Jupyter. This should open a new tab in your web browser with the typical
jupyterorjupyterlabinterface.
Selecting kernel on jupyter notebook
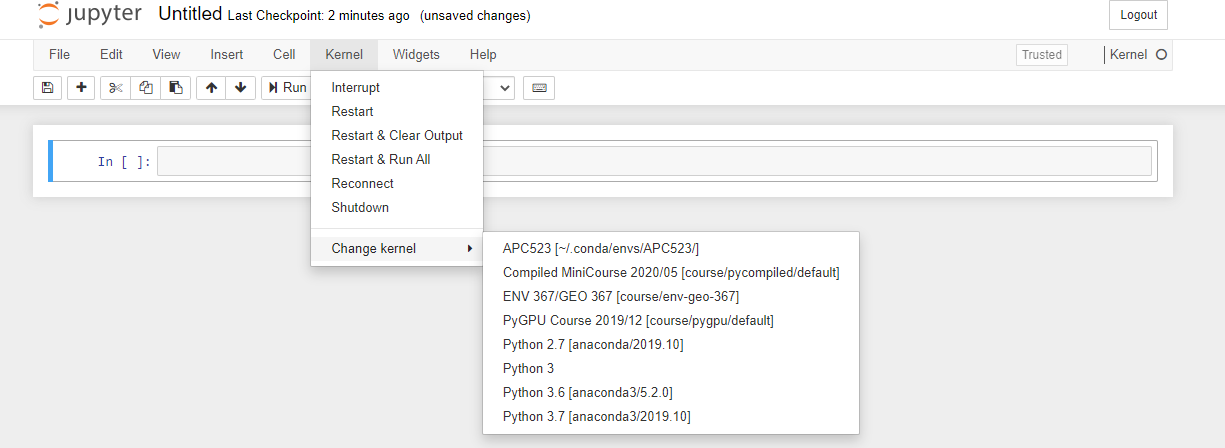
Select the kernel from our environment labeled as APC523 as the Notebook kernel when creating the notebook.
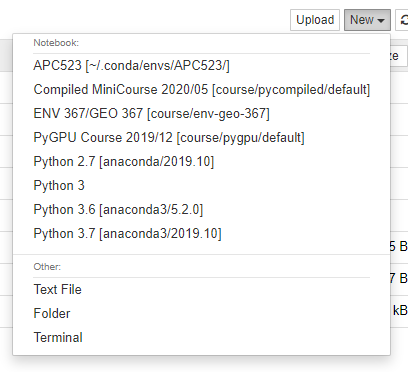
To change the current notebook kernel, click on Kernel > Change kernel and select a new kernel from the drop-down list.
Selecting kernel on jupyter lab
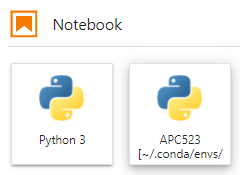
Select the kernel from our environment labeled as APC523 as the Notebook kernel when creating the notebook.
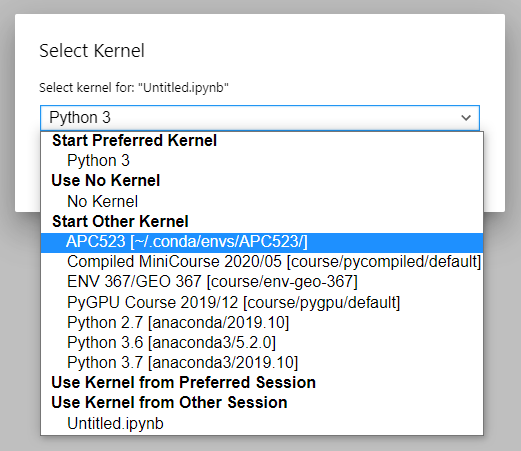
To confirm the current notebook kernel, it is displayed on the top right corner.

To change the current notebook kernel, click on the kernel name indicator and select a new kernel from the drop-down list.
Note that jupyterlab extensions are not currently available through MyAdroit.
Installing conda locally
- Install the appropriate
condapackage from its website. - Make sure the instalation is complete and you can use
condacommand in your console. - Set up the
condaenvironment - Activate the environment.
- Run either
jupyter notebookorjupyter lab
jupyterlab extensions
If you prefer to use jupyterlab there are some widgets that can help and should be installed through the terminal after activating the environment. Here I am installing packages related to matplotlib plotting module and collapsible_headings.
jupyter labextension install @jupyter-widgets/jupyterlab-manager @aquirdturtle/collapsible_headings
jupyter lab build
jupyterlab_execute_time extension
Included in the environment file is the jupyterlab_execute_time package. This extension is useful to measure cell execution time.
To enable this in jupyterlab insert {"recordTiming": true} in Settings > Advanced Settings Editor > Notebook > User Preferences or in [jupyterlab User Settings directory]/@jupyterlab/notebook-extension/tracker.jupyterlab-settings. Location of the jupyterlab user setting file can be retrieved through the command jupyter lab path.
For more information about this extension you can check in their GitHub page.